
As a methods administrator, you’ll sometimes be tasked with configuring or establishing the IP addresses of your servers to maintain up with altering community necessities. As such, having elementary expertise in assigning IP addresses and configuring hostname decision is essential in guaranteeing that servers conform with the community topology.
On this subject, we are going to first have a look at what an IP deal with is and delve into the variations between Ipv4 and IPv6. Then lastly, we are going to reveal the way to configure IPV4 and IPv6 addresses on a Linux system in addition to hostname decision.
What’s an IP Handle?
An IP deal with, which stands for Web Protocol, is a novel numerical identifier or deal with that identifies a tool in a TCP/IP community. This may very well be an area space community (LAN) or the web.
The IP deal with permits communication between units in a community reminiscent of servers, routers, switches, and another community system related to the community.
Distinction Between IPv4 vs IPv6
An IP deal with will be broadly categorized into two: IPv4 and IPv6.
IPv4 Handle
An IPv4 (IP model 4) deal with is a 32-bit quantity that’s cut up into 4 octets, with every octet separated by a interval or a decimal level. That is normally known as dotted-decimal format.
Every octet is made up of 8 bits which collectively characterize a byte. An IPv4 deal with can additional be divided into two sections. The primary half represents the community part, whereas the remaining half defines the host part.
Community Part
The community part of an IP deal with identifies the category the IP deal with belongs. There are 3 distinct lessons of IP addresses utilized in laptop networks: Class A, Class B, and Class C.
What’s IPv4 Class A
In Class A kind of community, the primary 8 bits (octet) outline the community, whereas the remaining 24 bits are reserved for the hosts within the community.
- The Public IP addresses vary from 1.0.0.0 to 127.0.0.0.
- The Non-public IP addresses vary from 10.0.0.0 to 10.255.255.255.
Addresses 127.0.0.0 to 127.255.255.255 are reserved for loopback and different diagnostic functions, and therefore usually are not allotted to hosts in a community.
The default subnet masks of sophistication A is 255.0.0.0 with the primary 8 bits used to determine the community. The remaining 24 bits are designated for hosts. This class is utilized in networks that command a lot of hosts. It yields a most of 16,777,214 hosts and 126 networks.
What’s IPv4 Class B
In Class B, the primary two octets, or 16 bits are used to outline the community ID.
- The Public IP addresses vary from 128.0.0.0 to 191.255.0.0.
- The non-public IP vary is from 172.16.0.0 to 172.31.255.255.
The default subnet masks is 255.255.0.0 the place the primary 16 bits outline the community ID. This class of IP is usually used for medium-large networks and yields 65,534 hosts per community with a complete of 16,382 networks.
What’s IPv4 Class C
This class of IP is generally used for small networks reminiscent of a house community or a small workplace or enterprise.
In a Class C community, the primary two community bits are set to 1 whereas the third is ready to 0, i.e. 1 1 0. The remaining 21 bits of the primary three octets outline the community ID, and the final octet defines the variety of hosts.
As such, Class C IP deal with produces the very best variety of networks amounting to 2,097,150, and the least variety of hosts per community which is 254 hosts.
- The general public IP addresses vary from 192.0.0.0 to 223.255.255.0.
- The non-public IP vary is from 192.168.0.0 to 192.168.255.255.
The subnet mast is 255.255.255.0.
Host Portion
The remaining part of the IP deal with is the host portion, which is the part that determines the variety of hosts in a community. This half uniquely identifies a number in a community. All hosts in the identical community share the identical community portion.
For instance, the next host IP addresses belong to the identical community.
192.168.50.15
192.168.50.100
192.168.50.90
IPv6 Handle
An IPv6 deal with is an alphanumeric deal with that’s 128 bits lengthy, organized in eight teams, every of which comprises 16 bits.
Like an IPv4 deal with, it’s cut up into two elements: the community and host part. The community half makes up the primary 64 bits and is used for routing functions. The remaining 64 bits recognized the deal with on the nodes.
Under is an instance of a full IPv6 deal with.
fe80:ce00:0000:5029:45ff:0000:211E:469C
This may be additional shortened as follows.
fe80:ce00:0:5029:45ff:0:211E:469C
IPv6 was developed as an answer to the approaching exhaustion of addresses in IPv4. As you recognize by now, IPv6 comprises 128 bits which is 4 instances greater than the variety of bits in IPv4 (32 bits). These additional bits present extra addressing house which can complement the deal with supplied by IPV4.
Though IPv6 is ready to take over from IPv4 addressing within the close to future, many organizations and ISPs nonetheless use and largely depend on IPv4 addresses.
In actual fact, you’ll hardly have to configure an IPv6 in your system to supply connectivity. The actual fact is, it would take some time earlier than IPv6 replaces or phases out IPv4.
Dynamic (DHCP) and Static IP Configuration
IP allocation on shopper machines or any end-point units related to a community is finished both utilizing the DHCP protocol or handbook configuration the place IP addresses are statically allotted.
DHCP IP Handle
DHCP (Dynamic Host Configuration Protocol) is a client-server protocol that dynamically allocates IP addresses to shopper methods on a community. The DHCP server, which usually is a router, comprises a pool of addresses that it leases out to shopper units on a community for a sure time period. Thus, it simplifies and makes the configuration of IP addresses extra environment friendly. As soon as the lease time lapses, the shopper acquires a brand new IP deal with.
Most methods, by default, are configured to acquire an IP mechanically utilizing the DHCP protocol. This eliminates the potential of IP conflicts in a community the place two units share the identical IP deal with.
The disadvantage of DHCP is that the IP addresses change as soon as the lease expires. If a server is ready to amass an IP through DHCP, it will result in connectivity points as soon as the IP deal with adjustments. And that is the place static IP configuration is available in.
Static IP Handle
In static IP configuration, IP addresses are manually configured on a shopper system, particularly servers. Not like dynamically allotted addresses, statically configured IP addresses stay the identical and don’t change.
Nevertheless, the static configuration requires a number of work from community admins. They should manually log in and configure the static IP together with different particulars reminiscent of subnet masks, DNS servers, and gateway IP. As well as, they should preserve monitor of all of the shopper methods with static IP addresses.
On this tutorial, we are going to concentrate on the way to statically configure IP addresses on varied methods.
The way to Configure IPv4 Networking in Linux
On this part, we are going to shift focus and see the way to configure an IPv4 deal with on Linux. We are going to have a look at how you are able to do this on Debian, Ubuntu, and afterward RHEL and Purple Hat distributions.
Configure IPv4 Handle on Debian
To get began, it’s all the time a good suggestion to examine your present IP configuration of the Linux system.
$ ip a
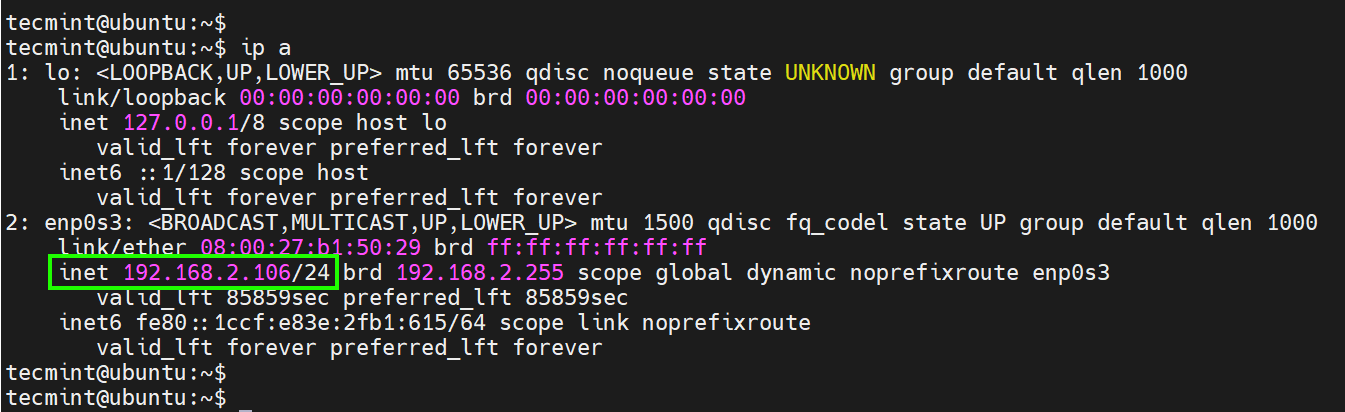
This shows the IP addresses and standing of your community interfaces. From the output, we have now two interfaces.

The primary one is the lo interface which is a loopback deal with reserved for testing functions solely and is all the time designated the deal with 127.0.0.1. The loopback deal with shouldn’t be related to any bodily community interface.
The second interface is enp0s3 (this may be completely different in your case). That is the energetic community interface that maps to the bodily community card on the server.
Its IPv4 deal with is denoted by the inet parameter, and on this case is 192.168.2.113, which is assigned through the DHCP protocol.
In Debian, the community configuration is contained within the /and so on/community/interfaces file. You may view it utilizing the nano or vim editor.
$ sudo nano /and so on/community/interfaces
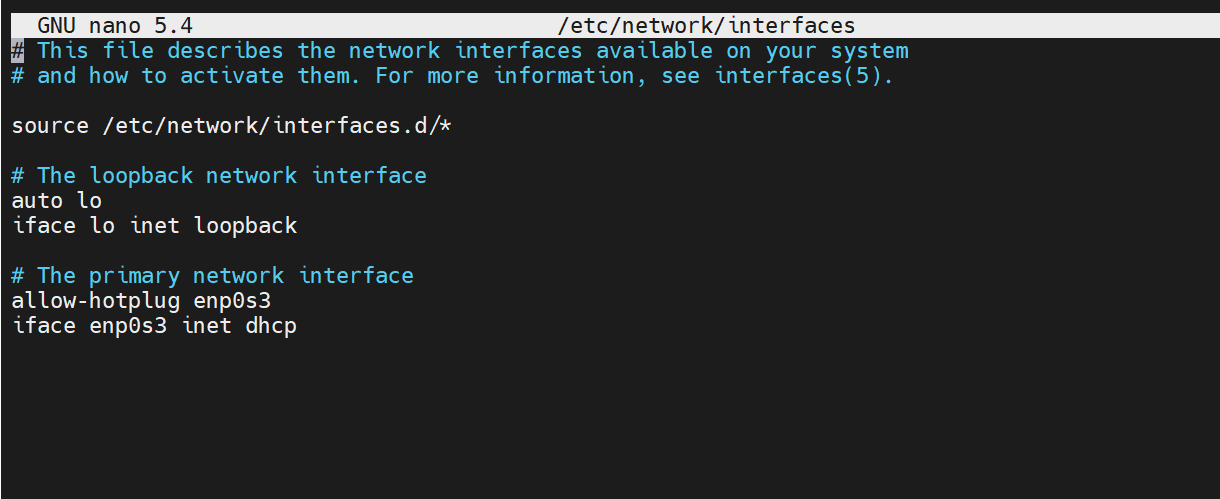
To configure a static IPv4 deal with, take away or remark the allow-hotplug and dhcp strains, Then add the next configuration.
# The first community interface
auto enp0s3
iface enp0s3  inet static
 deal with 192.168.2.150
 netmask 255.255.255.0
 gateway 192.168.2.1
 dns-nameservers 192.168.2.1 8.8.8.8
On this configuration, 192.168.2.150 might be our new IPv4 deal with with a netmask or community subnet of 255.255.255.0. The default gateway, which additionally occurs to be the router’s IP, is 192.168.2.1 whereas the DNS nameservers are 192.168.2.1 and 8.8.8.8.
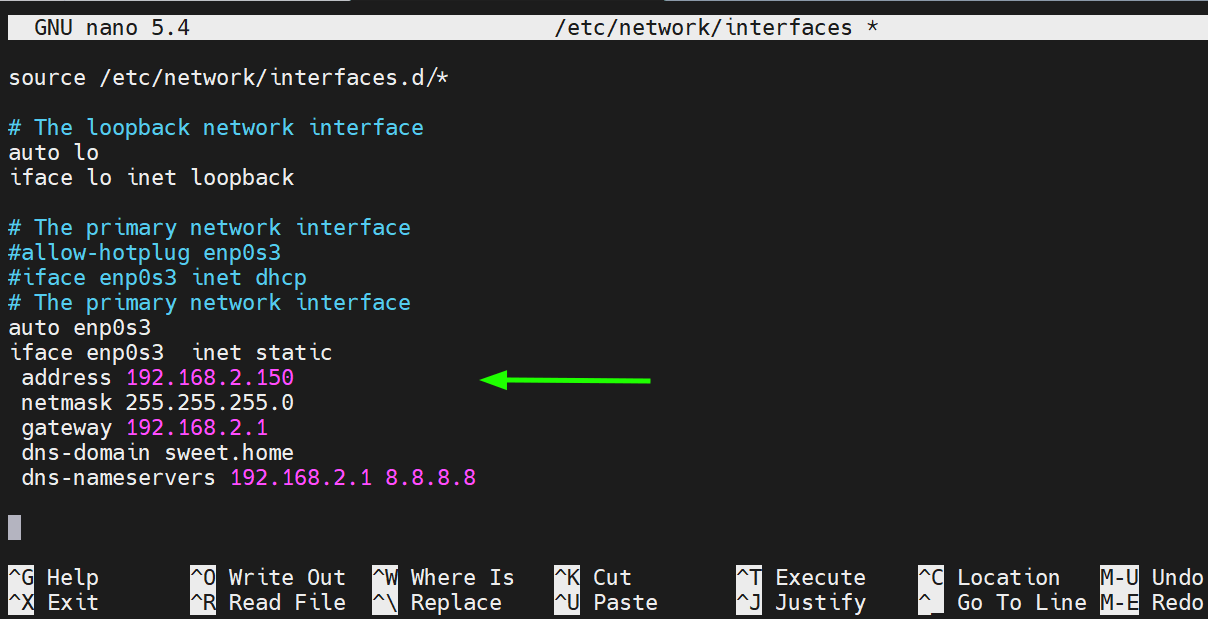
Save the adjustments and exit the file.
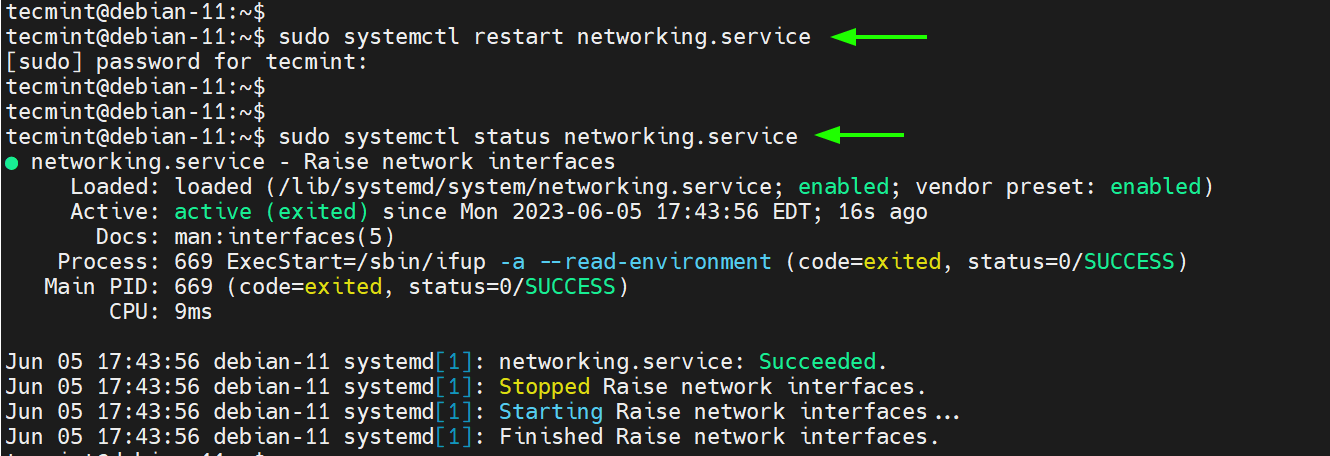
To use the adjustments, restart the networking service.
$ sudo systemctl restart networking.service
Then affirm no errors had been encountered
$ sudo systemctl standing networking.service
Notice: In case you are related to the server through SSH, your connection will drop and you’ll be disconnected. To entry the server as soon as once more, join utilizing the brand new IP deal with.
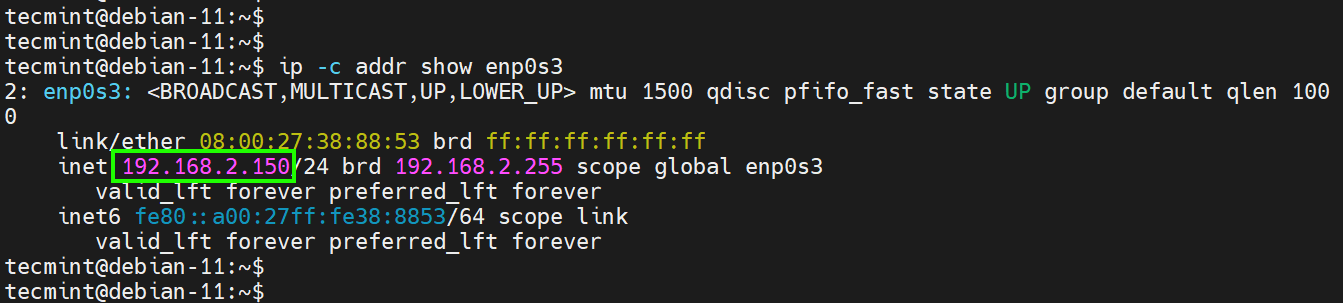
To verify that the server has acquired the brand new IP, run the next command:
$ ip -c addr present enp0s3
The output under confirms that we have now efficiently configured the static IPv4 deal with.
Configure IPv4 Handle on Ubuntu
In Ubuntu 18.04 and later variations, Netplan is the default community configuration device, which permits simple configuration of community settings through YAML recordsdata. In keeping with Canonical, netplan processes the YAML recordsdata and generates community configurations for systemd-network or NetworkManager.
The community configuration file for fashionable Ubuntu distributions is positioned within the /and so on/netplan listing. For the desktop system, the configuration file on this listing is 01-network-manager-all.yaml. For servers, the file is /and so on/netplan/01-netcfg.yaml.
As soon as once more, let’s examine our present IP deal with which is auto-assigned by DHCP.
$ ip a
Our present IP is 192.168.2.106. We are going to set this to 192.168.2.180.
To assign an IPv4 deal with, we are going to open the community configuration file.
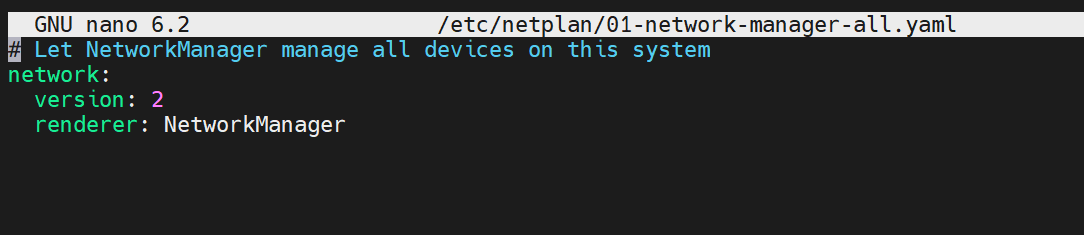
$ sudo nano /and so on/netplan/01-network-manager-all.yaml
By default, the next strains mechanically set the system to make use of DHCP for IP project.
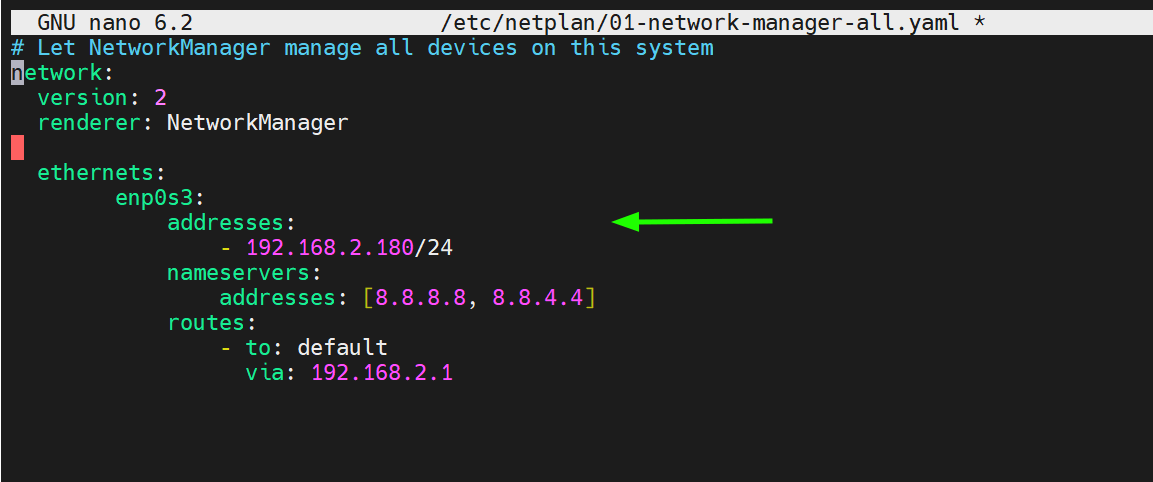
Add the next strains to assign a static IP.
 ethernets:
        enp0s3:
            addresses:
                - 192.168.2.180/24
            nameservers:
                addresses: [8.8.8.8, 8.8.4.4]
            routes:
                - to: default
                  through: 192.168.2.1
Allow us to break down the parameters used:
- enp0s3 – is the identify of the community interface.
- addresses – This configures the IPv4 deal with on the interface. That is adopted by the CIDR, on this case,/24 which suggests a community subnet of 255.255.255.0.
- nameservers – This specifies the DNS servers for use. On this case, we’re utilizing 8.8.8.8 and eight.8.4.4 that are Google’s identify servers.
- routes – This units the gateway in your system.
Keep in mind to switch the interface identify and IP configuration to match your community atmosphere.
Save the adjustments and exit.
To use the adjustments made, run the next command:
$ sudo netplan apply
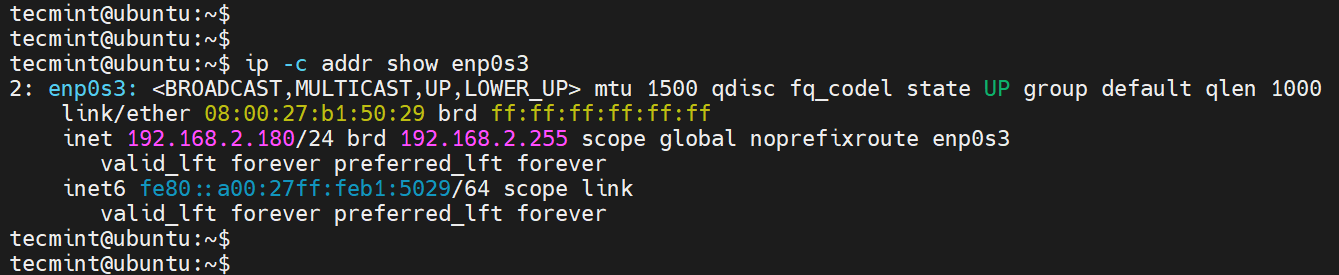
As soon as once more, confirm if the adjustments have been mirrored as proven.
$ ip -c addr present enp0s3
Configure IPv4 Handle on RHEL
In Purple Hat distributions, the nmcli (NetworkManager Command Line Interface) command-line device is without doubt one of the most most popular methods of configuring an IPv4 deal with. It does so utilizing the NetworkManager service.
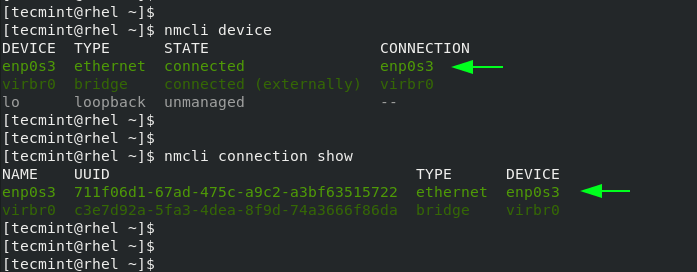
To view the community interface identify hooked up to your system, execute the command:
$ nmcli system
To show the energetic connection, run the command:
$ nmcli connection present
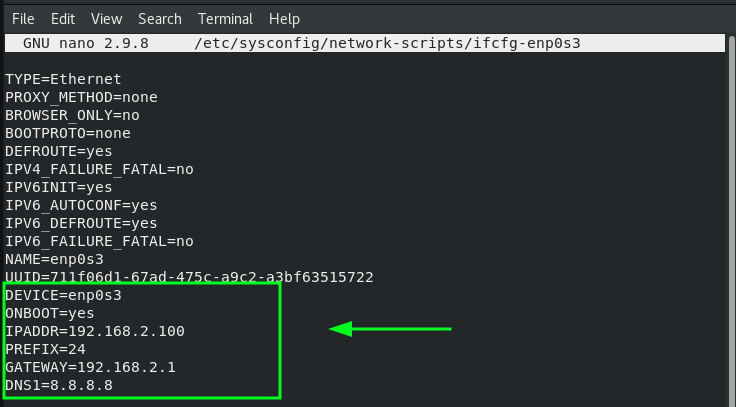
In RHEL 9 and different Purple Hat distributions based mostly on RHEL, the community configuration file resides within the /and so on/sysconfig/network-scripts listing. In our case, the configuration file is ifcfg-enp0s3.
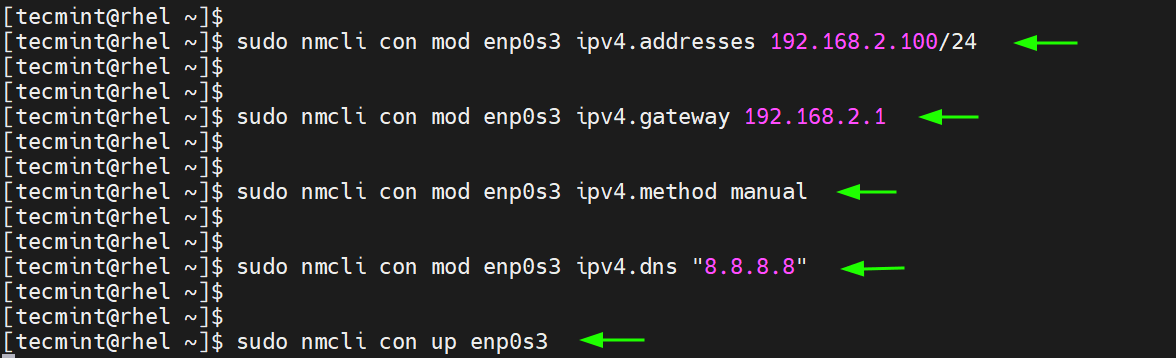
We are going to assign a static IPv4 deal with on the interface ‘enp0s3‘ as proven:
IP: 192.168.2.100
netmask: 255.255.255.0
gateway: 192.168.2.1
dns: 8.8.8.8
To take action, we are going to run the next instructions:
$ sudo nmcli con mod enp0s3 ipv4.addresses 192.168.2.100/24
$ sudo nmcli con mod enp0s3 ipv4.gateway 192.168.2.1
$ sudo nmcli con mod enp0s3 ipv4.methodology handbook
$ sudo nmcli con mod enp0s3 ipv4.dns "8.8.8.8"
$ sudo nmcli con up enp0s3
The instructions save the adjustments contained in the related community configuration file. You may view the file utilizing your most popular textual content editor
$ sudo nano and so on/sysconfig/network-scripts ifcfg-enp0s3
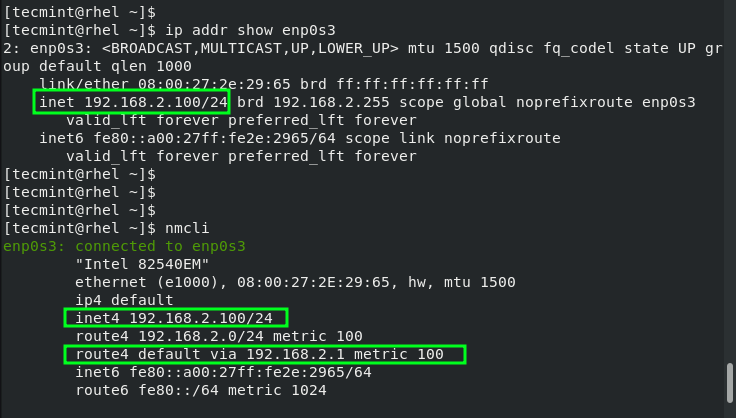
To verify the brand new IP deal with, run the next command
$ ip addr present enp0s3
You may also run the nmcli command with none command-line choices and the energetic interface might be displayed on the prime.
$ nmcli
The way to Configure Hostname in Linux
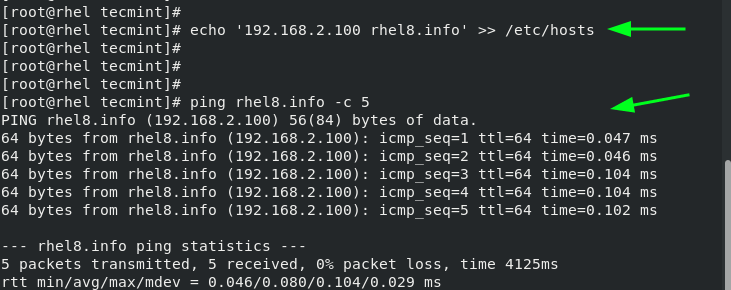
A well-configured system ought to have the ability to resolve its hostname or area identify to the IP deal with configured. Often, the hostname and IP deal with mapping is finished within the /and so on/hosts file.
To configure hostname decision, add a number’s entry to the /and so on/hosts file. This entry contains the host’s IP deal with and the hostname as proven.
$ echo '192.168.2.150 debian-11' >> /and so on/hosts
Be sure you replace the /and so on/hosts file on each Linux system that you simply intend to connect with the system on the identical native community.
As soon as executed, you possibly can efficiently ping the hostname of the Linux machine.
$ ping debian-11 -c 5
Conclusion
On this tutorial, we have now coated IPv4 and IPv6 IP addresses and explored how one can configure IPv4 networking and hostname decision on Linux.