This write-up will present other ways to repair the “Home windows Modules Installer Employee Excessive CPU” downside in Home windows 10.
Find out how to Repair the “WMIW” Excessive CPU Drawback in Home windows 10?
To repair the “WMIW” Excessive CPU downside in Home windows 10, strive the strategies listed beneath:
Technique 1: Delete the “SoftwareDistribution” Folder
The “SoftwareDistribution” folder accommodates the information that is likely to be wanted to put in the Window Updates. Subsequently, delete the “SoftwareDistribution” folder by following the directions offered.
Step 1: Open Providers
Press “Home windows+R” to launch the Run utility. Sort “companies.msc” and press enter:

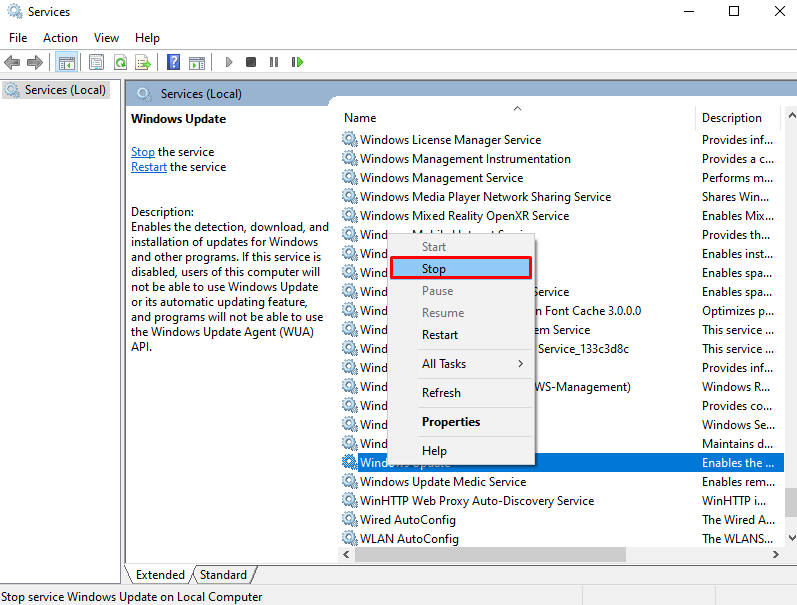
Step 2: Cease the Service
Scroll round to seek out the “Home windows Replace” service, right-click it when discovered and at last hit “Cease”:
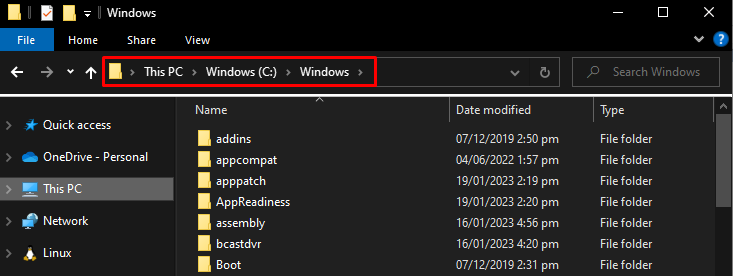
Step 3: Navigate to Home windows Folder
Open the “File explorer”, navigate to the “C” drive to change to the “Home windows” folder:
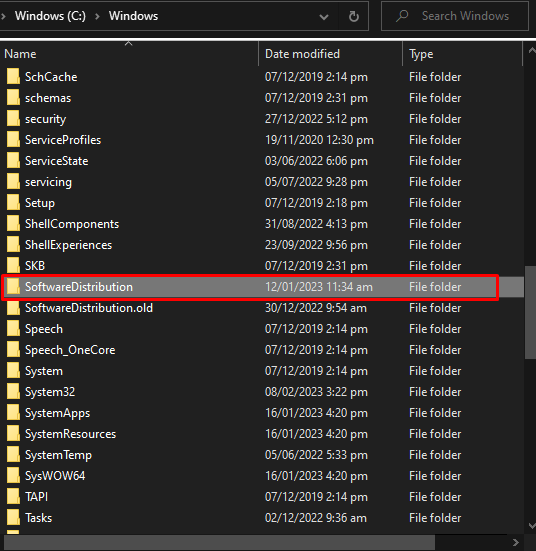
Step 4: Delete “SoftwareDistribution” Folder
Find the “SoftwareDistribution” folder and delete it when discovered:
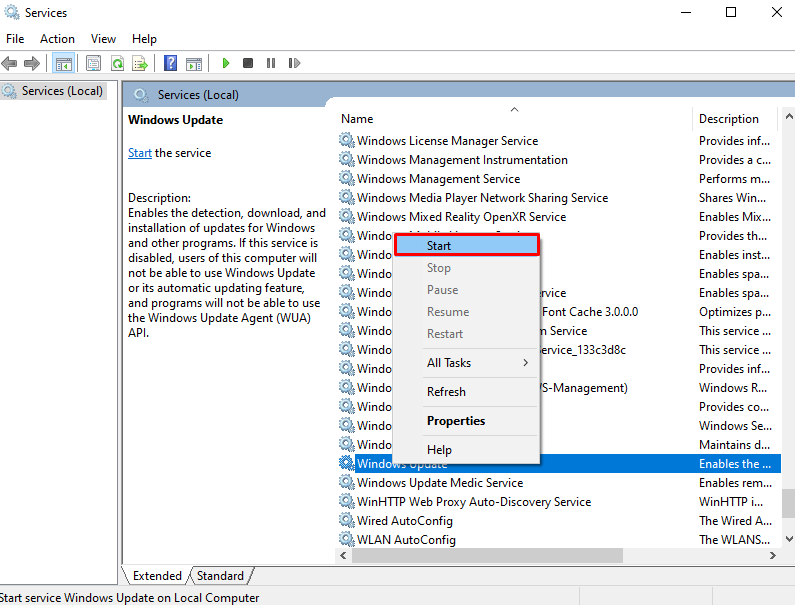
Step 5: Begin the Service
Begin the “Home windows Replace” service as proven beneath:
Technique 2: Begin the Replace Troubleshooter
Home windows has a built-in utility to repair fundamental points known as a troubleshooter. Run the “Home windows Replace” troubleshooter to resolve any issues concerning updating Home windows by following the steps beneath.
Step 1: Go to Settings
Hit “Window+I” to launch the Settings app:
Step 2: Go to “Replace & Safety”
Scroll down and choose “Replace & Safety” when discovered:
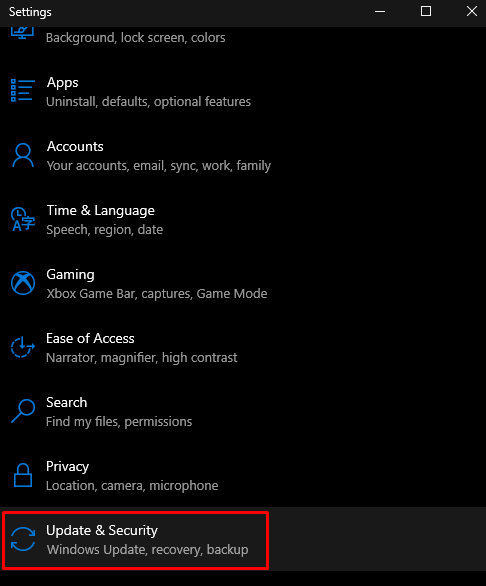
Step 3: Choose Troubleshoot
Hit the choice highlighted beneath:
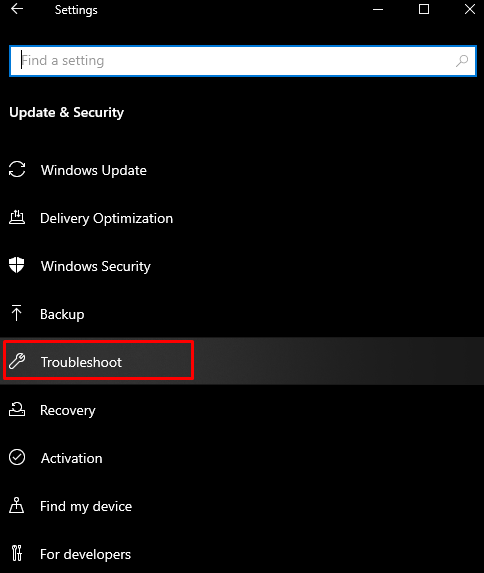
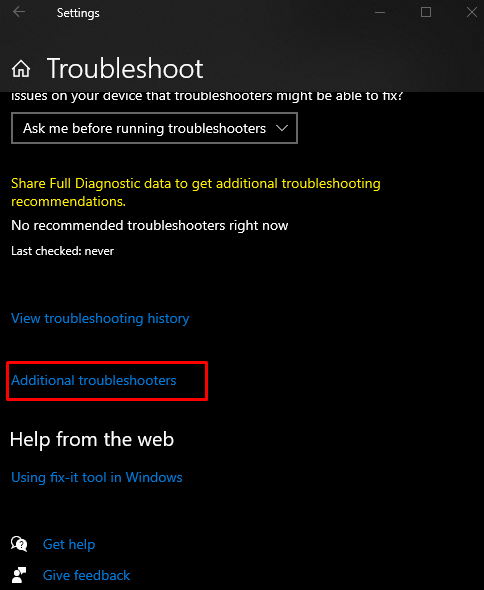
Step 4: See All Troubleshooters
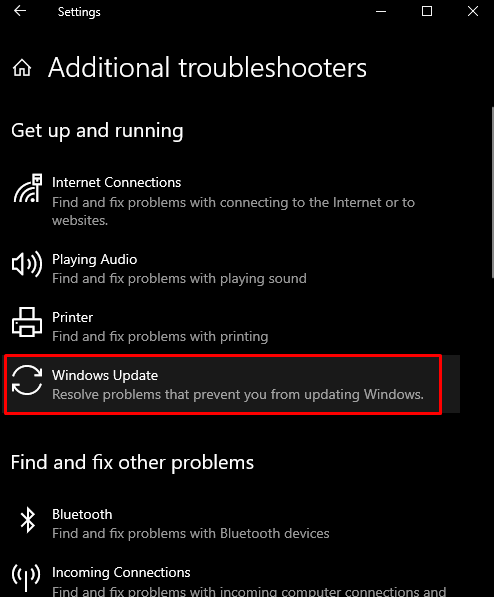
Hit the “Further Troubleshooters” as proven beneath:
Step 5: Decide Home windows Replace
Beneath the “Stand up and working” part, faucet “Home windows Replace”:
Step 6: Troubleshoot
Now, begin troubleshooting by urgent the highlighted button:
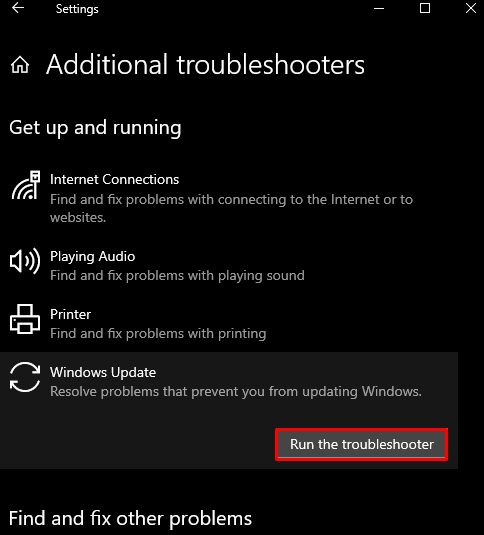
End the troubleshooting course of.
Technique 3: Run SFC Scan
System File checker seems to be for and fixes any corrupted system information. Execute the SFC scan command on a command immediate by going by the steps beneath.
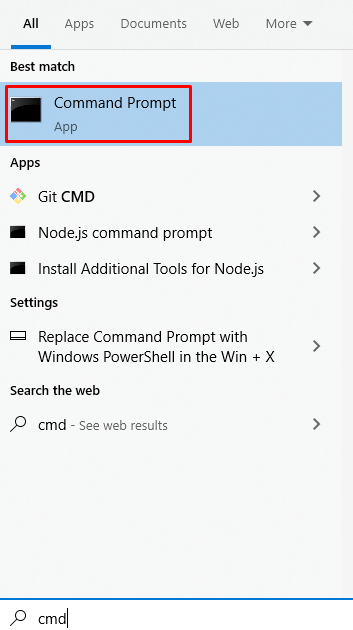
Step 1: Launch CMD As Admin
Sort “cmd” within the search field and hit “CTRL+SHIFT+ENTER” to run as admin:
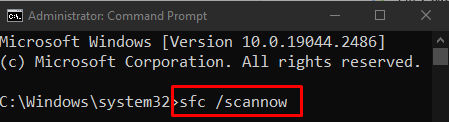
Step 2: Execute “sfc” Command
Write the below-given “system file checker” command within the terminal:
Technique 4: Use DISM Instrument
DISM is the following step we will take when SFC couldn’t repair the difficulty. This additionally seems to be for corrupted system information and fixes them by changing the defective ones.
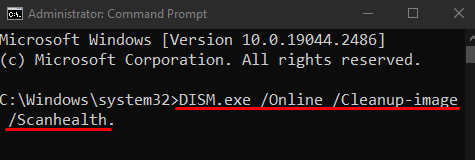
Step 1: Scan Picture Well being
Enter the “DISM” command given beneath to search for any corruptions in your system information:
DISM.exe /On-line /Cleanup-image /Scanhealth.
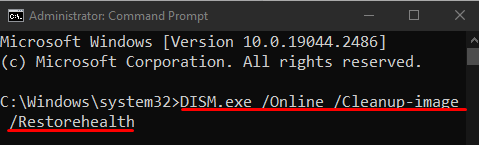
Step 2: Restore System Well being
Execute the below-given “DISM” command to try to restore the information which might be corrupted:
DISM.exe /On-line /Cleanup-image /Restorehealth
Technique 5: Restart the Home windows Replace Service
The malfunctioning of the “Home windows Replace” service could cause this difficulty which might be fastened by merely restarting the service.
Step 1: Discover the Replace Service
Open Providers and find the “Home windows Replace” service:
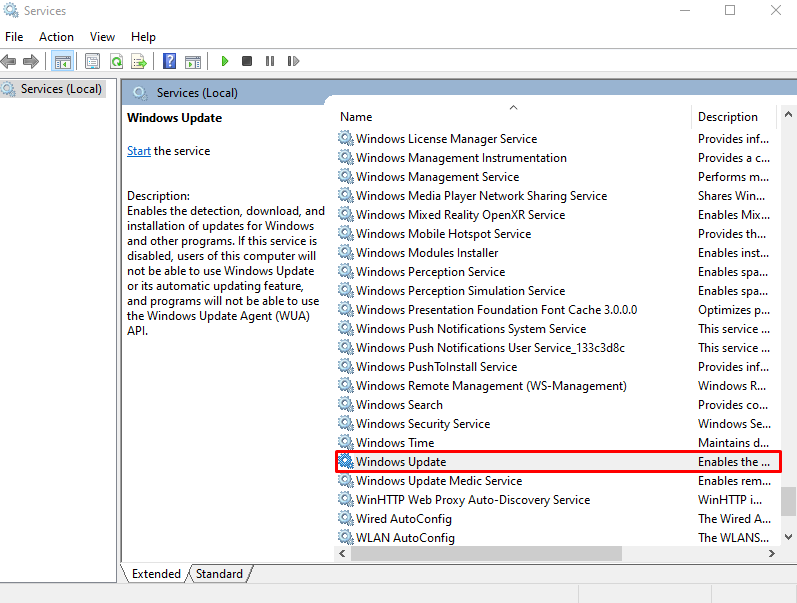
Step 2: Cease the Service
Proper-click the “Home windows Replace” service and hit “Cease”:

Look ahead to 10 to 30 seconds.
Step 3: Begin the Service
Proper-click on the service and hit the “Begin” possibility as highlighted within the picture:

Technique 6: Activate Metered Connection
A “Metered Connection” limits how a lot information they’re allowed to make use of. Activate “Metered Connection” by following the below-provided directions.
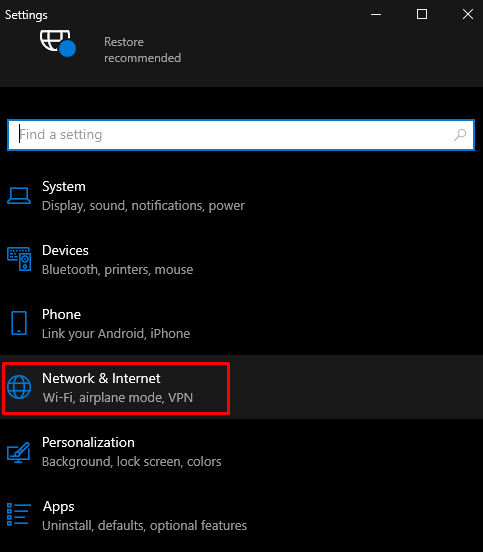
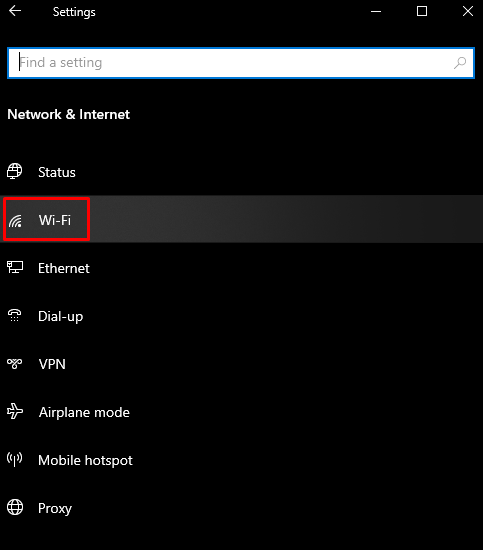
Step 1: Click on on Community & Web
Open Settings, scroll down to seek out “Community & Web” and hit it when discovered:
Step 2: Choose WiFi
Choose the class of the web:
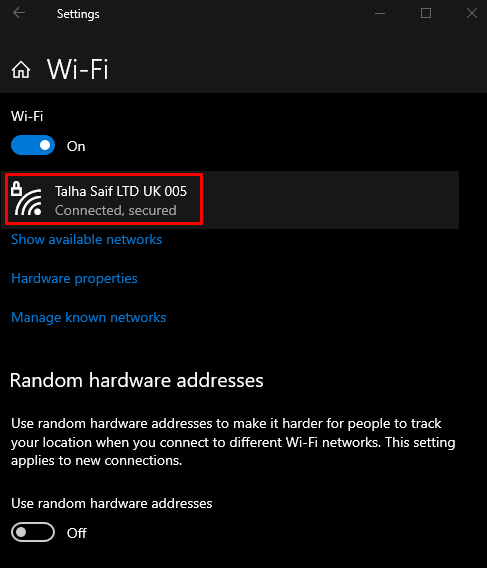
Step 3: Decide Your Community
Decide the WiFi community you’re at present linked to:
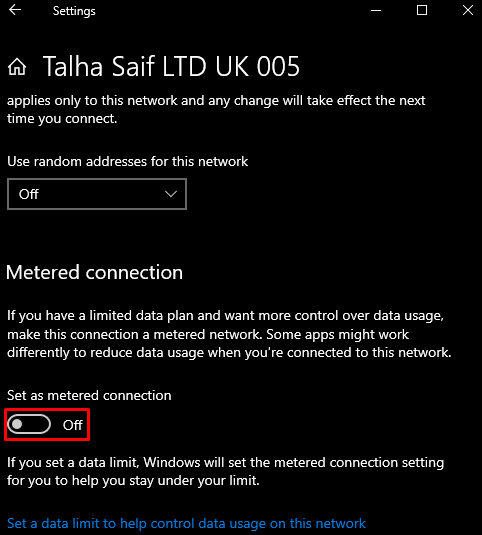
Step 4: Activate Metered Connection
Activate the “Set as metered connection” toggle button:
Now, restart the system, and the CPU utilization will get beneath management.
Conclusion
The “Home windows Modules Installer Employee Home windows 10 Excessive CPU” downside might be fastened utilizing numerous strategies. These strategies embody deleting the “SoftwareDistribution” folder, beginning the Home windows replace troubleshooter, working the SFC scan, utilizing the DISM device, restarting the Home windows replace service, or turning on the metered connection. This put up offered a number of strategies for fixing the mentioned excessive CPU utilization difficulty.