
Linux Filesystems are answerable for organizing how knowledge is saved and recovered. A technique or one other, with time, the filesystem could develop into corrupted and sure elements of it is probably not accessible. In case your filesystem develops such inconsistency it’s endorsed to confirm its integrity.
This may be accomplished through a system utility referred to as fsck (file system consistency verify), which checks the foundation file system mechanically throughout boot time or ran manually.
On this article, we’re going to evaluation the fsck command and its utilization that will help you restore Linux disk errors.
When to Use fsck Command in Linux
There are totally different eventualities when you’ll want to run fsck. Listed below are a couple of examples:
- The system fails besides.
- Information on the system develop into corrupt (usually you might even see enter/output error).
- The connected drive (together with flash drives/SD playing cards) will not be working as anticipated.
fsck Command Choices
The fsck command must be run with superuser privileges or root. You should use it with totally different arguments. Their utilization will depend on your particular case. Beneath you will note a number of the extra essential choices:
-A– Used for checking all filesystems. The checklist is taken from/and many others/fstab.-C– Present progress bar.-l– Locks the system to ensure no different program will attempt to use the partition through the verify.-M– Don’t verify mounted filesystems.-N– Solely present what can be achieved – no precise adjustments are made.-P– If you wish to verify filesystems in parallel, together with root.-R– Don’t verify the foundation filesystem. That is helpful solely with ‘-A‘.-r– Present statistics for every system that’s being checked.-T– Doesn’t present the title.-t– Completely specify the Linux filesystem varieties to be checked. Varieties may be comma-separated lists.-V– Present an outline of what’s being achieved.
Run fsck Command to Restore Linux File System Errors
In an effort to run fsck, you have to to make sure that the partition you will verify will not be mounted. For the aim of this text, I’ll use my second drive /dev/sdb mounted in /mnt.
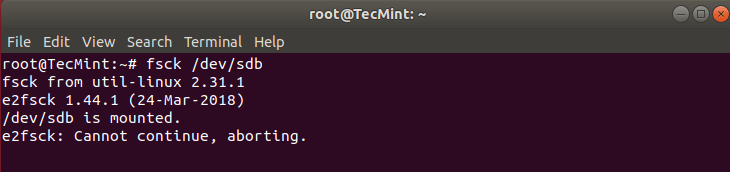
Here’s what occurs if I attempt to run fsck when the partition is mounted.
# fsck /dev/sdb
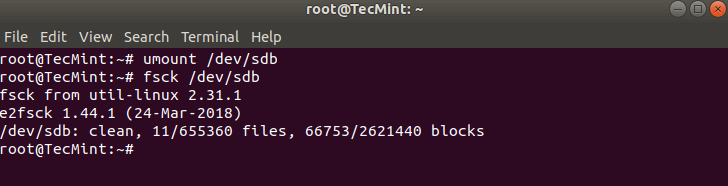
To keep away from this unmount the partition utilizing.
# umount /dev/sdb
Then fsck may be safely run with.
# fsck /dev/sdb
Understanding fsck Exit Codes
After working fsck, it is going to return an exit code. These codes may be seen in fsck’s handbook by working:
# man fsck

0      No errors
1      Filesystem errors corrected
2      System must be rebooted
4      Filesystem errors have been left uncorrected
8      Operational error
16     Utilization or syntax error
32     Checking canceled by person request
128    Shared-library error
Fsck Restore Linux Filesystem
Generally a couple of error may be discovered on a filesystem. In such circumstances, you might have considered trying fsck to mechanically try and appropriate the errors. This may be achieved with:
# fsck -y /dev/sdb
The -y flag, mechanically “sure” to any prompts from fsck to appropriate an error.
Equally, you may run the identical on all filesystems (with out root):
$ fsck -AR -y
Easy methods to Run fsck on Linux Root Partition
In some circumstances, you could must run fsck on the root partition of your system. Since you can’t run fsck whereas the partition is mounted, you may attempt certainly one of these choices:
- Drive fsck upon system boot
- Run fsck in rescue mode
We are going to evaluation each conditions.
Drive fsck Upon System Boot
That is comparatively simple to finish, the one factor you want to do is create a file referred to as forcefsck within the root partition of your system. Use the next command:
# contact /forcefsck
Then you may merely pressure or schedule a reboot of your system. In the course of the subsequent bootup, the fsck can be carried out. If downtime is important, it’s endorsed to plan this fastidiously, since if there are lots of used inodes in your system, fsck could take some additional time.
After your system boots, verify if the file nonetheless exists:
# ls /forcefsck
If it does, you could need to take away it to be able to keep away from fsck on each system boot.
Run fsck in Rescue Mode
Operating fsck in rescue mode requires a couple of extra steps. First, put together your system for reboot. Cease any important companies like MySQL/MariaDB and many others after which sort.
# reboot
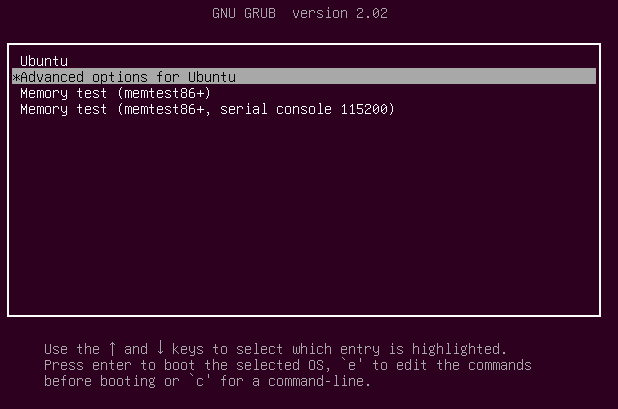
In the course of the boot, maintain down the shift key in order that the grub menu is proven. Choose “Superior choices”.
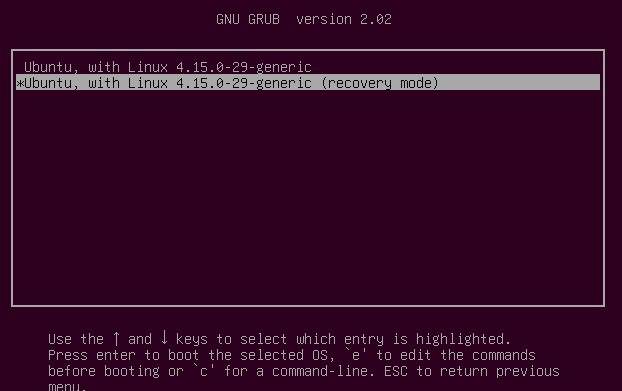
Then select “Restoration mode”.
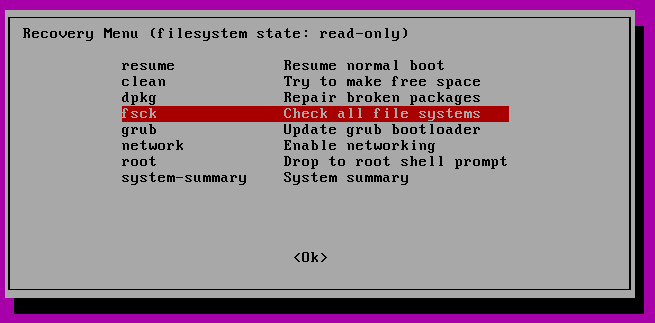
Within the subsequent menu choose “fsck”.
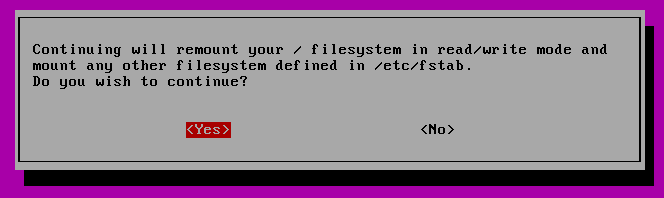
You may be requested if you want your / filesystem remounted. Choose “sure”.
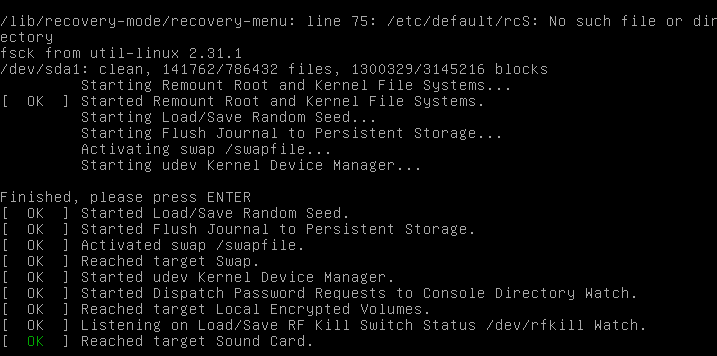
You need to see one thing just like this.
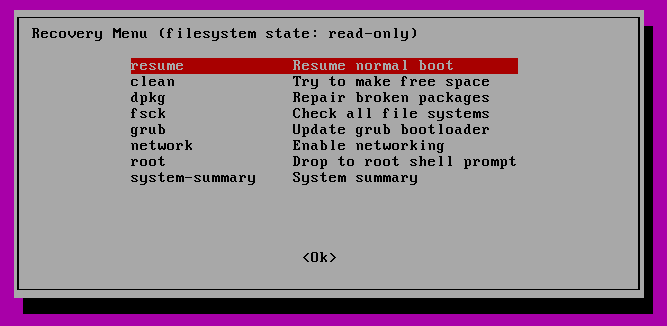
You may then resume regular boot, by deciding on “Resume”.
Conclusion
On this tutorial, you discovered easy methods to use fsck and run consistency checks on totally different Linux filesystems. You probably have any questions on fsck, please don’t hesitate to submit them within the remark part under.
If You Recognize What We Do Right here On TecMint, You Ought to Think about:
TecMint is the quickest rising and most trusted neighborhood website for any sort of Linux Articles, Guides and Books on the net. Hundreds of thousands of individuals go to TecMint! to go looking or browse the hundreds of printed articles accessible FREELY to all.
Should you like what you’re studying, please think about shopping for us a espresso ( or 2 ) as a token of appreciation.

We’re grateful to your by no means ending assist.