
Within the earlier tutorial, we launched a brand new characteristic of ScrollView in iOS 17, which allows builders to simply detect the scroll place and implement the scroll-up (or scroll-down) characteristic. Along with this performance, the most recent model of SwiftUI additionally introduces a brand new modifier referred to as scrollTransition that permits us to watch the transition of views and apply numerous animated results.
Observe: To comply with this tutorial, please ensure you use Xcode 15 (or up).
Beforehand, we constructed a fundamental scroll view. Let’s proceed utilizing it for instance. For reference, right here is the code for making a scroll view:
|
1 2 3 4 5 6 7 8 9 10 11 12 13 14 15 16 17 18 19 20 21 22 |
ScrollView { LazyVStack(spacing: 10) { ForEach(0...50, id: .self) { index in
bgColors[index % 5] .body(top: 100) .overlay { Textual content(“(index)“) .foregroundStyle(.white) .font(.system(.title, weight: .daring)) } .onTapGesture { withAnimation { scrollID = 0 } } } } .scrollTargetLayout() } .contentMargins(50.0, for: .scrollContent) .scrollPosition(id: $scrollID) |
Utilizing ScrollTransition Modifier
A transition in scroll views describes the modifications a toddler view ought to bear when its showing or disappearing. The brand new scrollTransition modifier allows us to observe these transitions and apply totally different visible and animated results accordingly.
To exhibit the way it works, let’s modify the code from the earlier part by including the scrollTransition modifier to the scroll view. Right here is the up to date code:
|
ScrollView {
. . .
} .scrollTransition { content material, section in
content material .opacity(section.isIdentity ? 1.0 : 0.3) .scaleEffect(section.isIdentity ? 1.0 : 0.3) } |
We apply a refined animation by altering the opacity and dimension of kid views. The scrollTransition closure passes two parameters: the kid view and the transition section. There are three attainable values for transition phases: .id, .topLeading, and .bottomTrailing. Based mostly on the section, we are able to apply totally different visible results.
The .id worth signifies that the kid view is totally seen within the scroll view’s seen area. The .topLeading worth signifies that the view is about to maneuver into the seen space on the prime fringe of the scroll view, whereas .bottomTrailing signifies that the view is about to maneuver into the seen space on the backside fringe of the scroll view.
Through the id section, scroll transitions shouldn’t usually lead to any visible modifications to the view. Subsequently, within the code above, we reset each opacity and dimension to their authentic state when the view is within the id section. For different phases, we make the view smaller and extra clear. That is how we animate views through the scroll transition.
Working with Scroll Transition Configuration
A scroll transition configuration controls how a view transitions because it seems or disappears. While you use the .scrollTransition modifier, the default configuration is .interactive. This configuration enables you to easily mix the transition impact as you scroll your view into the seen area of the container.
Aside from the default configuration, you even have the choice to make use of .animated to easily animate the transition when the view is displayed. You possibly can substitute the .scrollTransition modifier like this to realize a barely totally different animated impact:
|
.scrollTransition(.animated) { content material, section in
content material .opacity(section.isIdentity ? 1.0 : 0.3) .scaleEffect(section.isIdentity ? 1.0 : 0.3)
} |
Optionally, you may as well outline a threshold for the transition animation. Let me present an instance as an instance why we might have to regulate the brink. Within the code, modify the body top of the colour view from 100 to 300 like this:
|
bgColors[index % 5] .body(top: 300) |
After making the change, it is best to discover that the third merchandise within the scroll view is minimized and has already been utilized with the clear impact.
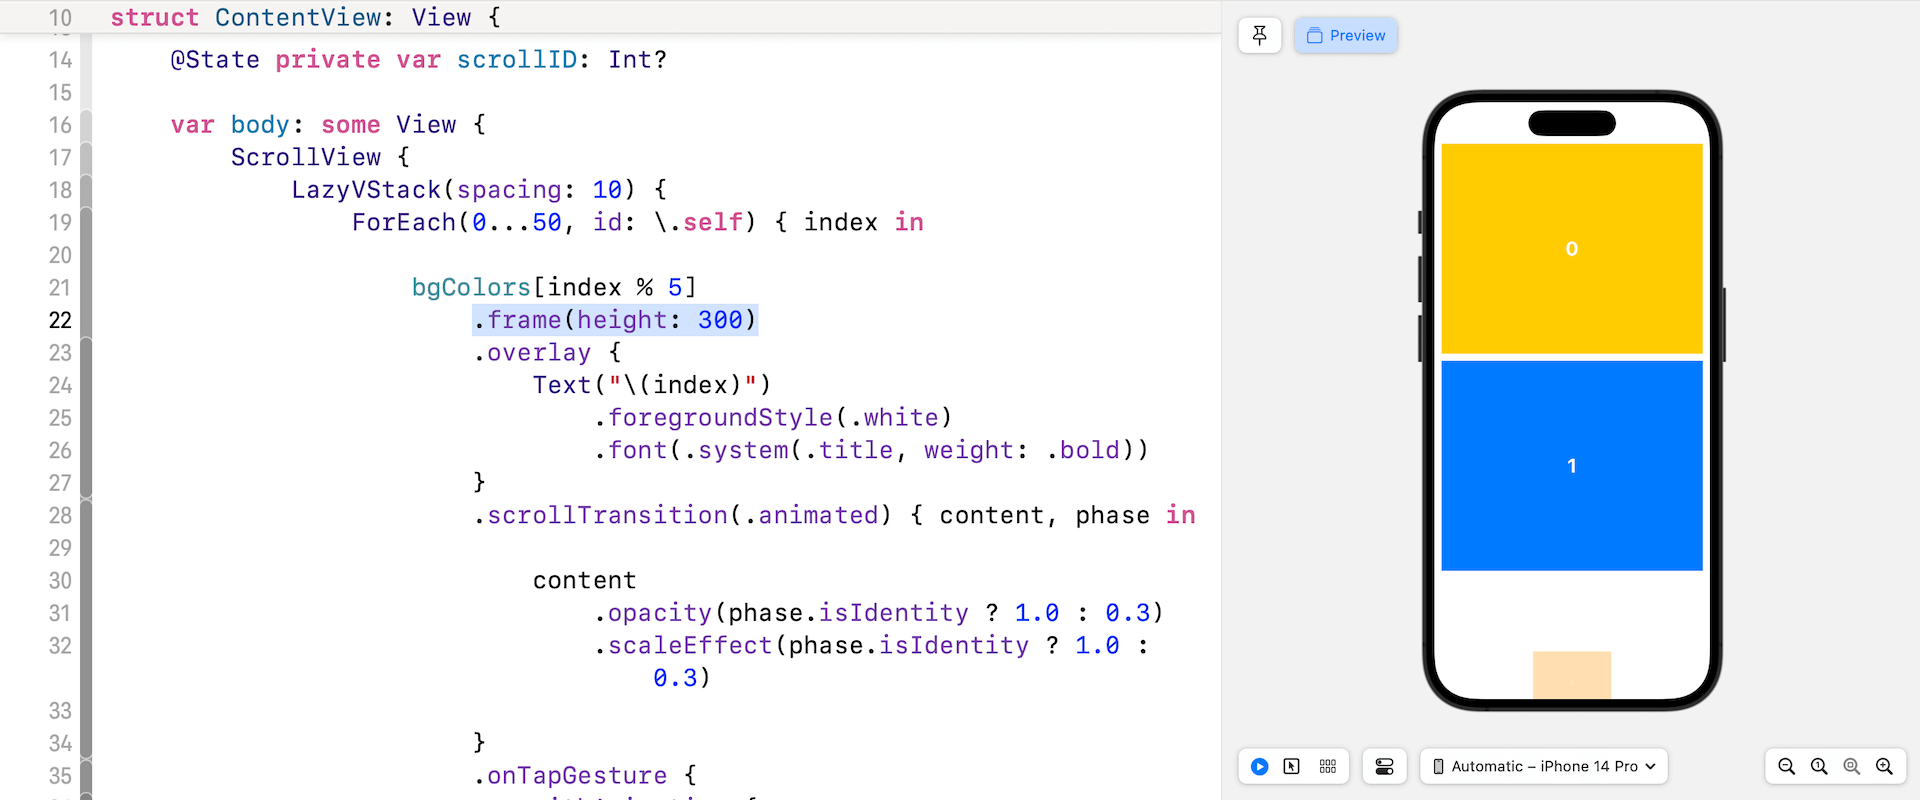
This isn’t the specified UI format. The anticipated conduct is for the third merchandise to be totally seen and never in a transitional state. On this case, we are able to alter the brink to outline when the animation takes place.
The brink determines when the view is taken into account seen (i.e. the id section) primarily based on how a lot of the view intersects with the scroll view. To vary the brink, you’ll be able to replace the scrollTransition modifier like this:
|
.scrollTransition(.animated.threshold(.seen(0.3))) { content material, section in
. . .
} |
The code above units a threshold the place the view is taken into account totally seen when it’s 30% seen inside the scrolling space. As quickly as you replace the code, the third merchandise of the scroll view will probably be totally displayed. The animation will solely happen when the merchandise is lower than 30% seen.
Utilizing the Part Worth
The section parameter supplies the worth of the transition section, starting from -1.0 to 1.0. This worth will be utilized to use scaling or different animated results. When the section is -1, it represents the topLeading section, and when it’s 1, it corresponds to the bottomTrailing section. The id section is represented by a price of 0.
For instance, we are able to make the most of the section worth to use a three-d rotation impact:
|
.scrollTransition(.animated.threshold(.seen(0.3))) { content material, section in
content material .opacity(section.isIdentity ? 1.0 : 0.3) .scaleEffect(section.isIdentity ? 1.0 : 0.3) .rotation3D(.radians(section.worth), axis: (1, 1, 1))
} |
Abstract
On this tutorial, we clarify learn how to use the scrollTransition modifier in SwiftUI to animate the transition of views in a ScrollView. The modifier permits builders to use numerous visible and animated results to baby views primarily based on the transition section.
By mastering this modifier, you’ll be able to take their app’s consumer expertise to the subsequent stage.
If you wish to study extra about SwiftUI, you’ll be able to take a look at our Mastering SwiftUI guide.